This link sends you to me latest Modeling Reel.
http://vimeo.com/7912045
Tuesday, 1 December 2009
Sunday, 13 September 2009
Arch-Vis Living Room
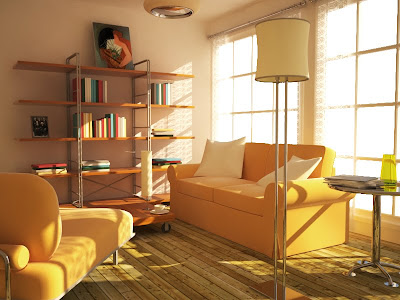
This is a little project I put together to basically understand lighting a bit more in how it behaves in a direct nature and global illumination. I have used V-Ray to render this scene with the Daylight System and rendered through a V-Ray Physical Camera. I think this image is a fairly good result due to this being an early attempt of mine to truly understand CG lighting better and something I will develop through V-Ray and Mental Ray.
I must note that most of the shaders used here were downloaded from www.vray-materials.de. But I have spent sometime studying these, to learn first hand how they work so i can put together my own, also I had to adjust some of the textures in Photoshop.
There are a few things such as the lack of Anti-Ailising around the objects that are near to the windows, the problem lies with the alpha channel (since there are no objects beyond). Therefore I need to find a way to add an object behind the windows which would create fine edges that doesn't affect the global illumination, but I have so far been unsuccessful. Unless however there is a way to render the image without this problem.
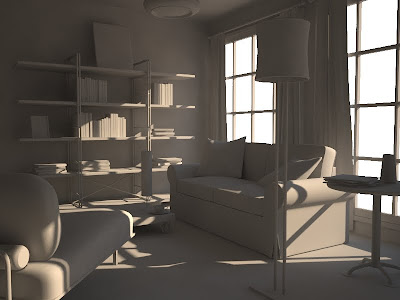
^This is a straight forward render of the scene with global illumination and the simple grey V-Ray material applied to everything. Notice how it has an orange tint, which was the idea of an early morning look.
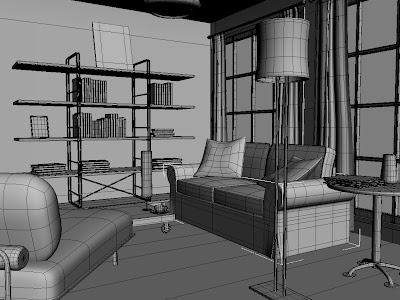
^This is a wireframe screenshot, with everything subdivided, but you can still see the original wires.
Saturday, 29 August 2009
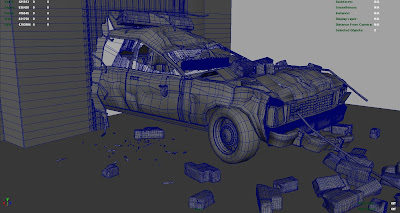
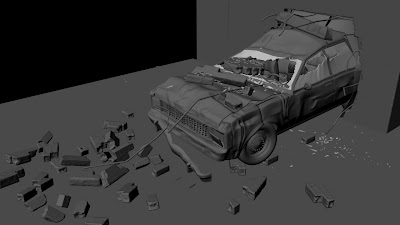
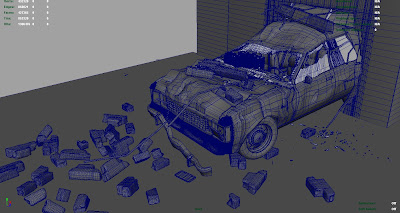
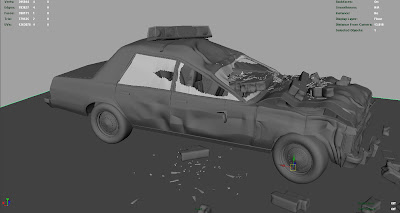
Crashed 1980 Cop Car
This is the current WIP of my 1980 NY cop car, which has smashed its way through a wall. The car is modeled on the 1980 Plymouth Volare, which I think has a wonderful style. It has been a bit of a challenge to understand the physics behind the damage, to understand how the shape is crushed from a head on collision. I have studied many pictures of damaged cars that clearly show how the different components of the car damage due to its shape, material and friction with surrounding components.
Modeling is being done in Maya, I plan to create renders in high res realistic subdivisions, textures and lighting. Then I plan to create a Games Environment version of the models, as part of my ongoing game art. I plan to create all the necessary maps and bake a global illumination map using Illuminate Labs Turtle renderer, to experiment with. Illuminate Labs are the makers of Beast which was used to bake out all the GI maps for games such as Mirrors Edge, so it should have some useful tools.
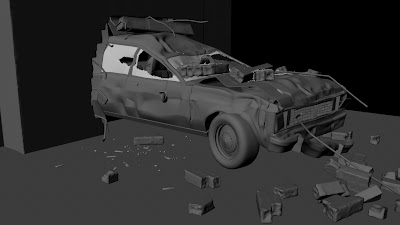
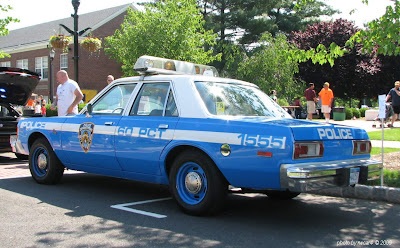
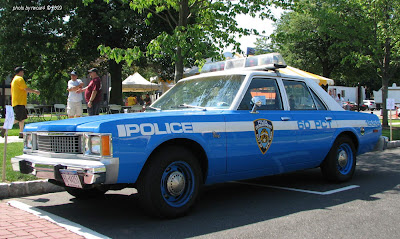
^This is the Plymouth Volare 1980 which the model is based on.
Modeling is being done in Maya, I plan to create renders in high res realistic subdivisions, textures and lighting. Then I plan to create a Games Environment version of the models, as part of my ongoing game art. I plan to create all the necessary maps and bake a global illumination map using Illuminate Labs Turtle renderer, to experiment with. Illuminate Labs are the makers of Beast which was used to bake out all the GI maps for games such as Mirrors Edge, so it should have some useful tools.


^This is the Plymouth Volare 1980 which the model is based on.
Sunday, 19 July 2009
Theres a hand in my head!!!
Well, yes. My current work in progress, is a fairly complex concept which i'm poly modeling most of the detail. This was a chance to demonstrate my modeling skills without having to run for help in Zbrush. Still lots to do, but it is starting to take shape so I thought I'd post some images now.
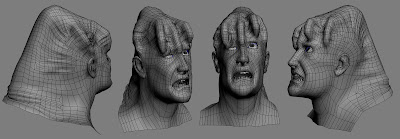

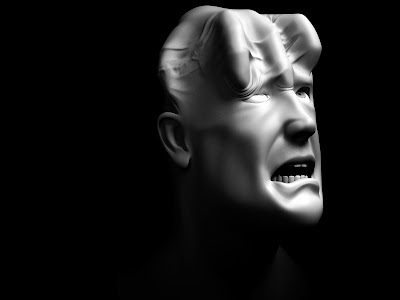
Image Below is the current wip of this head in Zbrush.
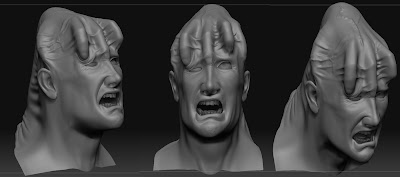


Image Below is the current wip of this head in Zbrush.

Sunday, 28 June 2009
New Games Art Reel
http://vimeo.com/5466519
For some reason the first image is vimeo's standard stripes, but the reel will play. It must.
Here is my new Showreel that's primarily aimed at games art, i've uploaded it into vimeo. Although this is the DVD version (720x576), you can also see the images below for a nice sharp image. I might re-render this into HD soon.
Game Scene
Here is a small game environment with several assets. I tried to create a small junkyard which is situated in the middle of a desert, its owned by a robot (in production) who collects anything he can find in the desert. He's brought the items to part of a buried platform where he has established himself a small shop and would sell the items to the player. Just simply click the images to view them at their full size.
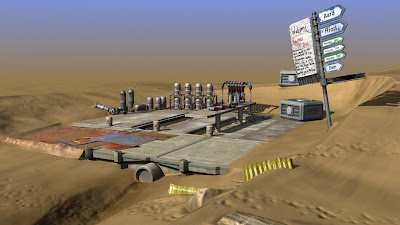
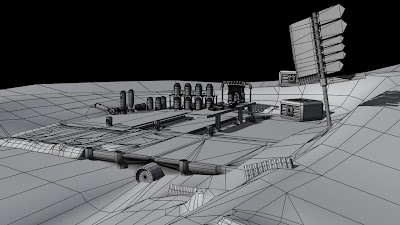
^This is the overall scene, the 2nd image is the floor alone, which is made up of six objects.
Total Floor Tris:3,960
Each Floor Texture Set: 2048x2048
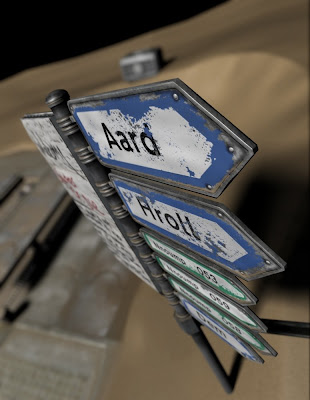
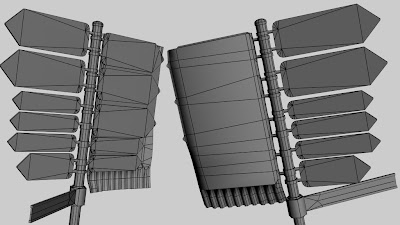
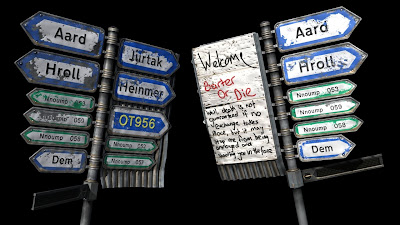
^This is the road sign, where the robot has used to hold his own sign.
Tris: 3,398
Texture Set: 1024x1024
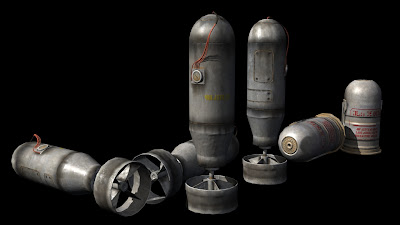
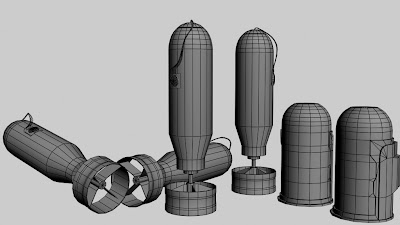
^These are some bombs and canisters used to fill the scene.
Bomb Tris: 2,068
Bomb Texture Set: 1024x1024
Canister Tris: 786
Canister Texture Set: 1024x1024
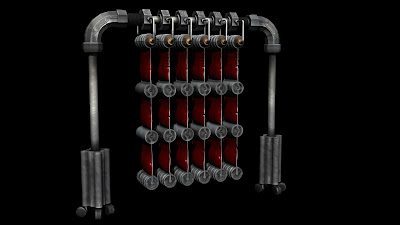
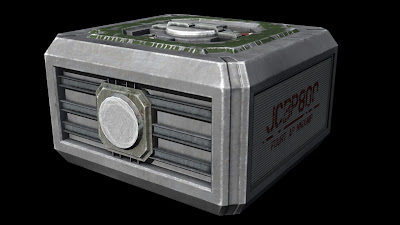
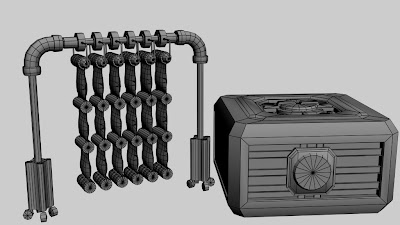
^The tall hanger object is used to carry saline and/or blood bags, The hanger itself is made up of two objects with 1024X1024 texture sets each which was needed to allow the high detail of the textures to appear without a single 2048x2048 set. Their are six blood bag chains (one chain contains three bags), each chain is a single object. The crate is used to store a lot of the items that are on sale.
Saline/Blood Hanger Object 01 Tris: 2,076
Saline/Blood Hanger Object 01 Texture Set: 1024x1024
Saline/Blood Hanger Object 02 Tris: 1,836
Saline/Blood Hanger Object 02 Texture Set: 1024x1024
Blood Bag chain Tris: 2,318
Blood Bag Chain Texture Set: 1024x1024
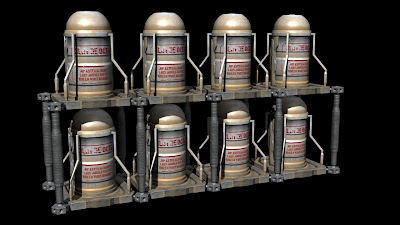
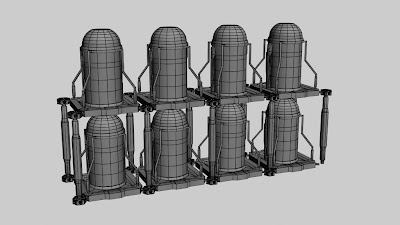
^This is a collection of stacked canisters, each canister is a single object including its holder. Other seperate objects are the corner hexagon shapes of the cage and the other are the vertical cylinders. With this collection of objects, it allows the possibility of different stacks.
Canister Tris: 1,422
Canister Texture Set: 1024x1024
Cage Hexagon Corner Tris: 660
Cage Hexagon Corner Texture Set: 512x512
Cage Cylinder Tris: 234
Cage Cylinder Texture Set: 1024x1024


^This is the overall scene, the 2nd image is the floor alone, which is made up of six objects.
Total Floor Tris:3,960
Each Floor Texture Set: 2048x2048


^This is the road sign, where the robot has used to hold his own sign.
Tris: 3,398
Texture Set: 1024x1024


^These are some bombs and canisters used to fill the scene.
Bomb Tris: 2,068
Bomb Texture Set: 1024x1024
Canister Tris: 786
Canister Texture Set: 1024x1024


^The tall hanger object is used to carry saline and/or blood bags, The hanger itself is made up of two objects with 1024X1024 texture sets each which was needed to allow the high detail of the textures to appear without a single 2048x2048 set. Their are six blood bag chains (one chain contains three bags), each chain is a single object. The crate is used to store a lot of the items that are on sale.
Saline/Blood Hanger Object 01 Tris: 2,076
Saline/Blood Hanger Object 01 Texture Set: 1024x1024
Saline/Blood Hanger Object 02 Tris: 1,836
Saline/Blood Hanger Object 02 Texture Set: 1024x1024
Blood Bag chain Tris: 2,318
Blood Bag Chain Texture Set: 1024x1024


^This is a collection of stacked canisters, each canister is a single object including its holder. Other seperate objects are the corner hexagon shapes of the cage and the other are the vertical cylinders. With this collection of objects, it allows the possibility of different stacks.
Canister Tris: 1,422
Canister Texture Set: 1024x1024
Cage Hexagon Corner Tris: 660
Cage Hexagon Corner Texture Set: 512x512
Cage Cylinder Tris: 234
Cage Cylinder Texture Set: 1024x1024
Head Model based on Actor Brian Thompson
This model was created to resemble the actor Brian Thompson who's most famous for playing tough villains in primarily sci-fi movies and dramas. I chose this man to base my model and sculpt on due to his unique facial features, the details although their origins are unknown to me, seem to look like their is a imbalance in fatty tissue within the face, such as one area stores more fatty tissue than other areas. For example, the tissue surrounding the mouth are full of volume and slightly covers the cheeks to create a very hard edge, but the cheeks seem to lack in fatty tissue and so the zygomatic arch of the skull shows through the skin.
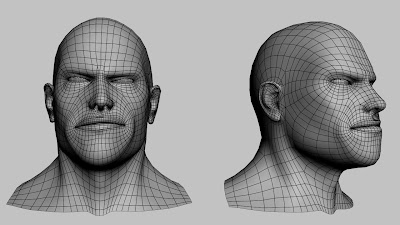
I created the model in 3ds max which i wanted to get the full volumes before sculpting in Zbrush, which i later did to bring out the fine details. With this sculpt a normal map generated at 1024x1024 was applied to the head at its lowest level to see how effective the normal map is. Here are the images, just click for a full view.
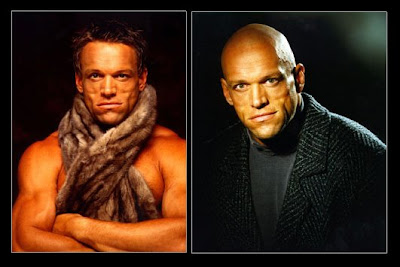
^ These are a few of the reference images I used of Brian Thompson.
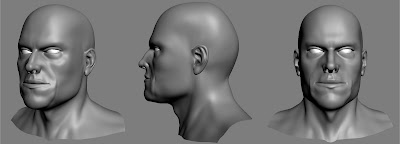
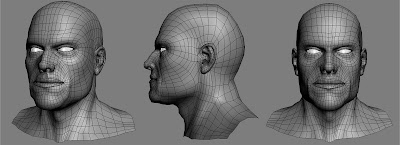
^This is the original model which I created in 3ds max and I sub-divided it to make sure the mesh clean.
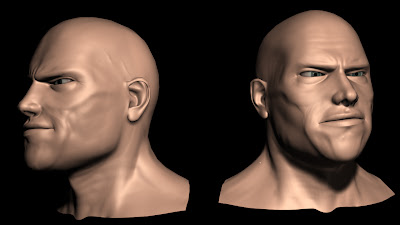
^This is the original mesh with a normal map applied as a test to show how it would work with a low poly object.
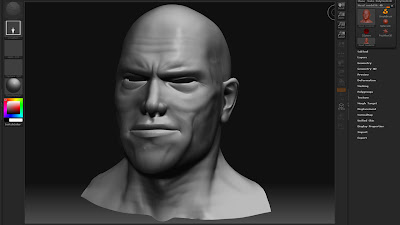
^This is the Zbrush sculpt, took me about a day and a half but i feel it needs more work.
^This is the model that was exported from Zbrush since the mesh has changed from the original, and the bottom image shows the that low poly head with the 1024x1024 normal map applied on top. Normally an optimized game mesh would be created and then a normal map generated, but this was a simple exercise.
I created the model in 3ds max which i wanted to get the full volumes before sculpting in Zbrush, which i later did to bring out the fine details. With this sculpt a normal map generated at 1024x1024 was applied to the head at its lowest level to see how effective the normal map is. Here are the images, just click for a full view.

^ These are a few of the reference images I used of Brian Thompson.


^This is the original model which I created in 3ds max and I sub-divided it to make sure the mesh clean.

^This is the original mesh with a normal map applied as a test to show how it would work with a low poly object.

^This is the Zbrush sculpt, took me about a day and a half but i feel it needs more work.

^This is the model that was exported from Zbrush since the mesh has changed from the original, and the bottom image shows the that low poly head with the 1024x1024 normal map applied on top. Normally an optimized game mesh would be created and then a normal map generated, but this was a simple exercise.
Subscribe to:
Comments (Atom)